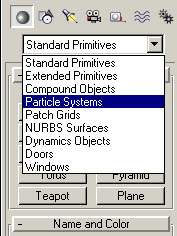
And these are the different types you can create.
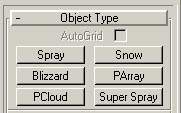
Let's create a Spray particle system and see what it looks like. Click and drag out an emitter in the Top viewport and you should see a nice, flat square with a normal pointing down. A normal, if you didn't know, is a line that is orthogonal to another plane, line or whatever. This normal (line) points to the direction of our particle flow. For the Spray system there are some parameters of course.
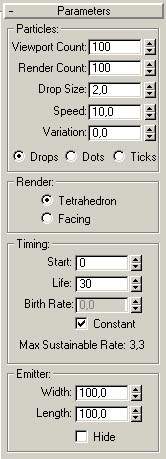
Particle related. The Viewport Count simply is how many particles you want to see in the viewport previews. Keep this numner low since 1000000 particles in 4 viewports can easily slow things down. Render Count is the number of particles to be visible in the rendered image. Drop Size, Speed and Variation are pretty straight forward. Also the radio buttons Drops, Dots and Ticks determine the shape of the indivdual particles. All other options are also logical. Some render options, timing options and emitter ones.
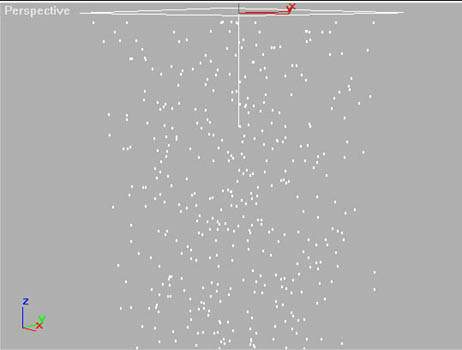
As you might have noticed there are no particles visible in our viewport. How do we remedy this? Drag the animation slider and see how the drops are falling from the emitter. Nice. If you want frame 0 to have particles visible set the Start valute to -100.
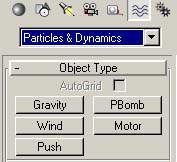
Now. A particle system can't be manipulated like an ordinary object. Sure, you can scale, rotate, move and map materials to them. But you can't use modifiers in the same way as you might be used to. What you can use is the forces of nature. Yes, that's right. There is something called Space Warps in 3ds max. With these you can for example simulate wind and gravity. So now we are going to set up some wind blowing on our spray. Space Warps are found under the Create tab as always and they look like this. You will also have to select from the rolldown menu. Select Particles &emp; Dynamics.
Let's create some wind blowing on the side of our spray. Click and drag in the Left or Right viewport to create a Wind emitter. It looks like a square with an arrow pointing out from it. Now we have to tell our spray system to be affected by this wind we have just created. This we do with a tool called Bind to Space Warp.

Now click and hold on the Spray particle system and then drag and release it over the Space Warp. You will notice that the icon changes and there's a dotted line from the spray to where you dragged it. Wow! Now you see that the spray bends in the wind.
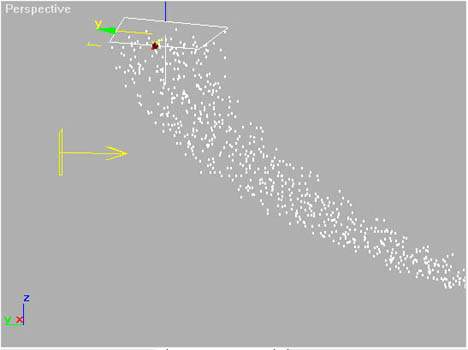
The yellow arrow thingie to the left is the Wind Space Warp and to the right we have our Spray Particle System. There are more space warps of course. One called deflector which can deflect particles like solid objects and there is also one called gravity which simulates gravity. Of course there are options to tweak for these.
Maybe you want to have rose petals falling down from the ceiling. Now how do you do that. It's got to be very hard, doesn't it? Nope. Not that hard. First start with modelling the rose petal. Maybe by drawing a nice texture, applying it with an opacity map to a rectangle with some segments and then bending it a bit. Just maybe. Do it the way you like. When done with this you create a Blizzard particle system. This is a system with A LOT of parameters but don't allow that to scare you. Most options are logical and you will figure out pretty soon how to master the others. Now go into the options of this system. Expand the Particle Type rolldown and select Particle Types as Instanced Geometry. Then under Instancing Parameters click Pick Object and select your rose petal. Now you should have tons of rose petals tumbling down from heavens above. Maybe something like this...
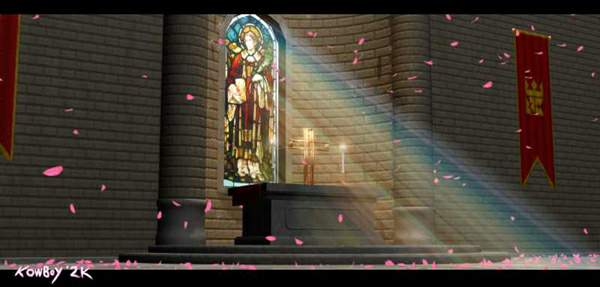
Actually you should be able to do a pic like this by now because this is the last article in this series which was made for you by me. I wanted to show you in a couple of easy and straight forward tutors that 3d graphics doesn't have to be a pain in the ass. Hope you all liked this series and are kind enough to drop me a mail to tell me what else I should do. Thanks to all who gave me feedback!