The question today is: What are volumetric lights?
Volumetric lights in 3ds max are lights that have volume. That is, you can actually see the light beams shining through the air. Much like if you are in a dusty room and the sun shines through a window creating small sunbeams. In my picture "divine light" I used volumetric light to create the sunbeams passing through the church window. In max these lights are easy to create but a pain in the ass to set up for some nice looking results. Ok, so how do we do it?
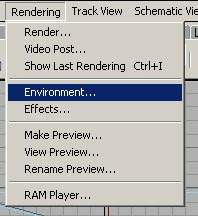
First we create a simple Directional Spot and we want it to cast shadows so we click the box Cast Shadows. We set up the positioning of the spot and since it's going to cast shadows it would be really nice if we hade something for them to land on. So create something for the light to land on. Maybe a patch grid or some boxes. Now we want to add the volume to our light. On the Rendering rolldown (up and near the file menu) select Environment.
And then this box pops up.
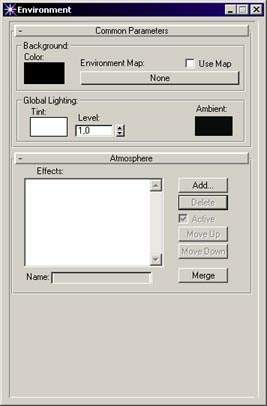
Under Atmosphere we want to add a so called Volume Lights effect. Click the Add button and select Volume Light from the popup box. Now we have to select which light we want the volume light to originate from, i.e. our volumetric light source. You noticed that when you added the Volume Light a rolldown below the atmosphere menu expanded. Here you can see a button which says "Pick Light". Click that button and then click on the light which you want to have some volume on (in a viewport of you choice). Now we have created our first volumetric light.
Select the perspective viewport and render it to a image. Beware! Volumetric lights are heavy to calculate so it can really take a long time to finish the rendering if you have a slow computer or rendering to a monster resolution. Anyway this is what it looked like for me.
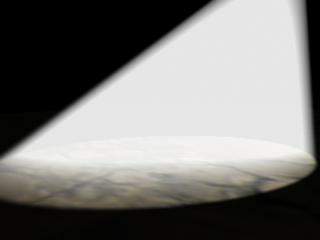
Looks like someone is pouring milk from our light, which is very boring, so let's look at the options we have on these kind of lights. Go back to the environment settings and our volume light. Rendering->Environmet and click on our Volume Light in the select list.

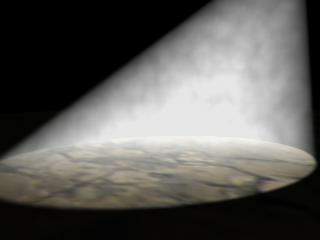
As you can see there are some parameters that you can tweak here. For example you can change the Color and the Density, i.e. the thickness, of the light. Also you can change the type of shadows under Filter Shadows allowing you to control the quality of it. A really nice feature is that you can add some noise to it and thereby make the fog more chaotic and alive. Here I played with the noise function.
Getting better. Try animating some parameters and make a short movie from it. The noise feature will look very cool in motion. One of the coolest things you can do with volumetric lights is to add a projector map to them and by that color the light from a texture you have drawn. Let's do that shall we. Close down the environment box if you still have it up, highlight the light and goto the modify tab.

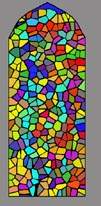
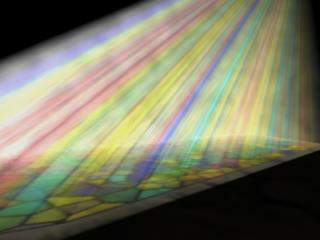
Here I have selected a test texture (see above) I did for my divine light pic. Click the button below the Projector Map text. The Map/Materials Browser will open. Select New and Bitmap. An open file dialog appears and you select the texture you want. Now we also want the cone of the spot to have the same proportions as the texture we selected has. Right above the projector map you see the Light Cone options. See that the Circle radio button is checked? Check the Rectangle button and the click Bitmap Fit to get the correct aspect ratio for the light cone. Render the perspective viewport and look! Sweeeeet!
Now that wasn't so bad was it. As always you should play around with the settings to truly understand them. Worth keeping in mind when modelling a scene. Test the volumetric lights in a seperate scene before adding them to your final one. They are time concuming, both in tweeking and rendering... Next part will be a crash course on particle systems. So be good and I'll be back.