KOWBOY's kickass 3D Studio Max r3 tutorial
Part 7 - Textures on my face
"A good model can't save a poor texture, but a good texture can save a poor model."
I have no idea who said this. But it is SO true. Many 3d people fall when it comes to textures. You often see great looking models, complex and very high detail but they don't look real. How come? Their texture skills sucks horse arse! (I hope I offended someone. ;) )
This is why today we are gonna learn about textures in 3ds max. Before you start reading you should already have done as I said in an earlier part (I think it was part 3): You should already have browsed through the material libraries that are shipped with max. There are several good textures about which you should try to understand how they are built up. So we are going to create some easy textures with bumpmaps, opacity maps, speculars and then how to map these to our nice objects. I'll give you a crash course in how to make tilable textures also since so many of you demomakers don't have a clue about those. :)
The material editor - the textured heart of 3ds max.
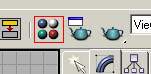
This is how you enter:
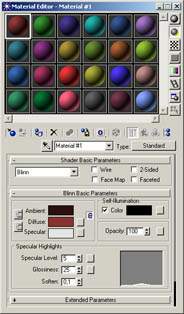
And this is how it looks:
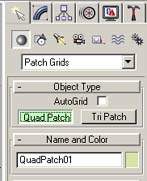
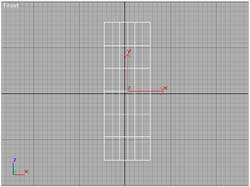
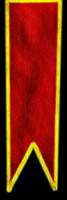
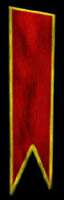
In the last article I skipped the modeling part of the banners because I thought they fit better in this one because of how they were made. So we will start with creating a nice banner ourselves. The first thing we do is the model. Easy. We create a quad patch in the front viewport with the proportions you want it to have. Maybe side:height = 1:3. I use patches because they are two dimensional, which is ideal for our banners. You will find the patch menu under the rolldown menu under the create tab.
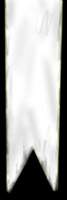
Before we add some nice waviness to the banner we want to create the texture for it. Where and how you draw your texture is up to you, I prefer photoshop and the use of an wacom artpad. First we draw the texture, the one that that we want to apply as a texture, with some nice colors. Then we make a new grayscale picture of this one. This texture we are going to use as an opacity map. On this texture black represents transparent and white solid. When we apply this to the patch we created the patch won't look like a rectangular anymore but it will have the shape of our texture. A very nice way to keep the polycount down in your scenes. Ok, so these textures are what you should need now. I made them while typing these lines so excuse the lack of quality. :)
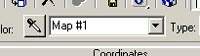
What we do now is that we go into the material editor and select the first material in the box, material #1. Don't worry about all the settings, I'll go through them in a while. Expand the maps rollout like this and this is what you see:
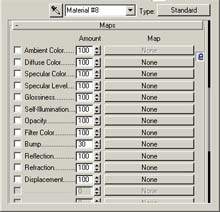
The diffuse color line is the one for our texturer. So click on the button to the right which says none. The map/meterials browser will open and from the list select bitmap since we want our picture to be there. Now select our file for the banner texture in the open file window. When done you will be in the options menu for map#1 which is the diffuse color.
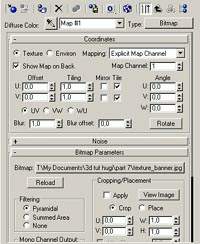
Here are a lot of settings. Not many we need to consider now but you should know that you can set the tiling of a texture in here. All you have to do is to enter a different number than 1 in the tiling boxes. But we don't want to do that so leave everything as it is and click material #1 in the rollout which says map #1.
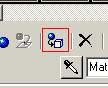
Now you are back to the maps rollout. Now we want to set our grayscaled opacity map as the opacity map.
Click the none button on the opacity line and do as above but select the grayscaled picture instead. After doing this you should be back to the maps rollout. Now drag and scroll up (or de-expand the rollout) so we see the shader basic parameters. As you see the preview of the material doesn't look so good. It looks like a sphere and doesn't tell us anything about how it will look on a plane surface. To see a preview of the material on another primtive type you need to click this box located in the upper corner of the material editor:
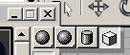
Now you see that the material preview changed to a box one and that our texture looks good. Press the assign material to selection button (with the patch selected) to put the texture to our object.
Now render the scene and look at the pretty result. :)
To add the waviness effect that you can see in my picture you can use something called spacewarps or a modifier called wave. I won't go through how those work in this article since this one is on textures. If you want me to do that please drop me a mail and I'll write an article about that.
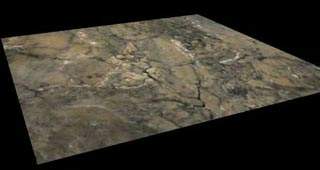
Now we want to map the floor wih a nice texture. There is a nice texture shipped with max called stones_benedeti. The problem with this texture is that it isn't tilable by default. Let me show you what I mean.
Create a patch for the floor in the op viewport and apply this material to this surface. If you render the scene it will look something like this.
Now we want to tile this texture on this floor because it looks to large and stretched. To do this there is an modifier called UVW map. Apply this modifier and you will see some radio buttons and some input fields. With the radio buttons you specify the method of how max should apply the texture. We want to stick to planar since it is a plane surface we want to map. The easiest way to understand these kind of methods is to create a sphere and to map a texture to this object in the with the different types. Try that later.
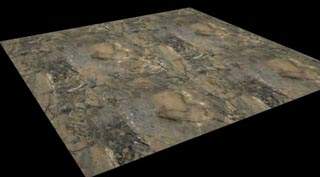
Now. In the U tile and V tile enter the values 2. This means that the texture will be repeated 2 times in each direction. The U, V and W coordinates are texture coordinates similar to X, Y and Z. Render the scene and you will see where the texture ends and where it starts again. Like this:

How to solve this problem. Well, the stone texture is called benedeti.jpg. Find and make a copy of this file which can be found in the 3ds max /maps dir. Now you will need photoshop or a program similar to that. Open the texture. Under the filter menu there is a filter called offset. Can be found under Other->Offset and it looks like this:
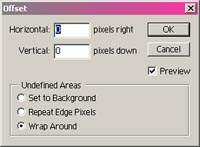
What this plugin does is that it takes the picture and offsets it, i.e. moves it, x pixels right and y pixels left. Enter 160 and 120, that is half of the picture's resolution. Make sure the wrap around is checked. Now the texture looks like this:
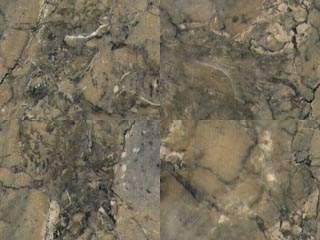
You really can see those ugly seems, can't you. We will now use the clone tool to "clone" parts of the texture near the seem border, draw it on the border and by doing so remove it.
Difficult?
Ok. This is the clone tool:

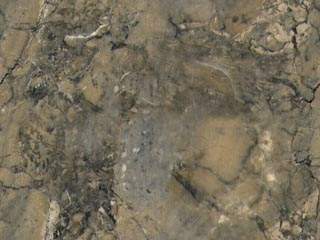
Zoom in on you texture so you can see it very clearly. Now press and hold the alt button and click next to the seem. This will set the area which you want to copy to another location on the pic. Use a rather small brush with low opacity and then draw over the seem to make it disappear. Do all over the pic and soon you will have removed it completely and made you own tilable texture. This is how mine looks after 5 minutes of work.
Now if you go into 3ds max again, enter the material editor and select the stone_benedeti texture we will replace the old benedeti texture with our newly edited one. Expand the maps rollout and click the button where it says benedeti.jpg. Now select our texture in the file location option. Do the same for all field containing the old filename. Render the scene and voila!
Much better don't you say... it still isn't perfect because you can see that it has been tiled. It still needs some work in photoshop but that's up to you now that you know how to do it. :)
Maybe you noticed that this material has a bump map. A bump map is a texture that "fakes" bumpiness on the surface without altering the original mesh. This is very good in many cases. For example in this case when we want a plain surface like a stone floor to have small bumps and cracks in it. In general the bump map should be grayscale. It works just like the opacity map, i.e. white is high and black is low.
That's all you have to know about textures for this time. I didn't use anything else for my divine light picture. Well ok. The window texture is transparent so that the light can shine through it. It's easily done by changing the opacity setting. But you would have figured out that pretty soon anyway.
So if you want more articles please send in suggestions and such. I have only a few more topics to cover before you should be able to create a pic like mine. More is to come for sure... but what? Maybe I should introduce alias|wavefronts maya program to you. :)