KOWBOY's kickass 3D Studio Max r3 tutorial
Part 6 - Igniting your creativity
So hey, I'm back with another max tutor and a lot of things have happened since the last ones. If you've missed these tutors, they are up at cfxweb along with hugi so now you can read them online. Wow! :)
Anyway I felt compelled to inform you that 3ds max 4 is shipping. YES! And isn't that a KICKASS program or what. I'm so hyped about it and I have no time to play with it 'cause I have to write theses tutors on max r3.1 and at the same time I have to study maya in school. Maybe I shouldn't complain at all... hehe.
Some guys asked me if I could do a maya tutor also and sure I could. But first I want to finish these tutors on max and get some nice feedback and such. So if you also want to see a maya tutor, drop me a mail. Also I want to thank everyone who gave me positive feedback, thank you, thank you. :)
Enough with the idle talk and on with the tutor.
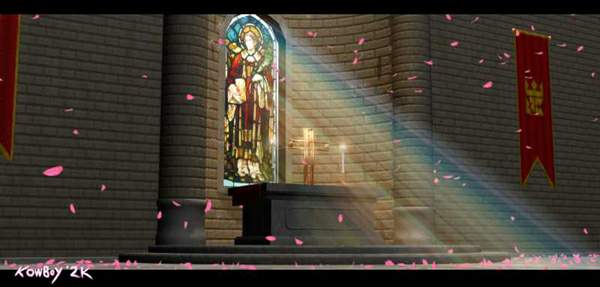
So what will we learn today. We will learn this:
Nice picture, isn't it. :)
This is a picture I created for the asm2k raytrace compo and I though it would be a great idea to tell you how I did it since it contains a lot of things that are good to know when modeling a scene. It will probably take more than one tutor to explain everything but this is what you will learn:
1. Modeling using primitives and modifiers
2. Creating, editing and mapping textures
3. Lightening the scene with that nice colored volumetric light
4. Adding some life with particle systems
So let's get started with the modeling part. This picture is very easy to model 'cause it mainly uses standard primitives. I should tell you this right away. I will only go through and describe the different techniques I used when doing this pic. I won't rebuild it, only explain it. Anyway, you shouldn't be disappointed by that. :)
As you easily can see, the walls and the floor are plain boxes and not hard at all to model. The altar isn't so hard either. It's a box with some extruded faces. Say what? Extruded faces??? Ok. Let's do the altar.
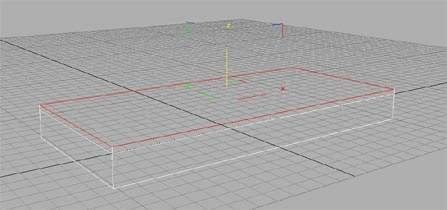
We start out with a box with the dimensions somewhat like this:

Now we convert it to an editable mesh. Simple. Do it by either right-clicking the box in a viewport and selecting the convert-to-editable-mesh option from the rolldown menu OR by accessing the modify tab (I hope you remember where it is otherwise you are in trouble ;) ) and clicking this little button called edit stack:
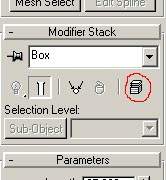
From there you can also select the convert-to-editable-mesh option.
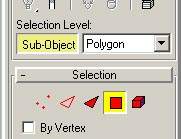
Now that we have done that, we want to sculpt our altar with something called extrude faces. Click the Sub-Object button so that it turns yellow and select polygon from the rolldown next to it.
Also I recommend that you switch the perspective viewport to "fullscreen mode" by pressing w or the Min/Max toggle button down in the right corner. This will make it easier to see what the heck you are doing and speed up your work. Switch to wireframe mode, right-click the perspective viewport text and select wireframe, then select the top polygon of our box.

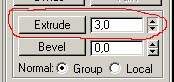
Now we will extrude this face up a bit to give the bottom a rounder look. Simply drag the slider next to the extrude button and you will see the result instantly in the viewport. Remember that as soon as you have released the spinner 3dsmax interprets that as that you are done with the extruding, and your next spin on the spinner means a new extrude on your newly created polygon.
And this is the new polygon/face we just extruded.
Now scale the new face down, move it up a bit and extrude some more and we will have an altar ready for texturing. It can look something like this.
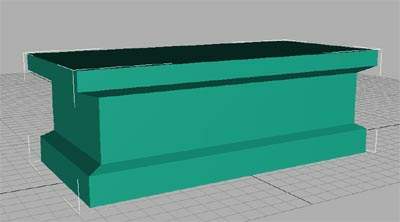
It looks very primitive and blocky but that's ok because we are gonna texture it later on and let the texture do the job of roughing it up a bit.
Now scroll up and take a look at the pic again. Done? Ok, good. As you can see the pillars are simple cylinders but the base of the cylinders doesn't look like any standard geometry. That's right, they aren't standard geometry - they are made with a modifier called lathe.
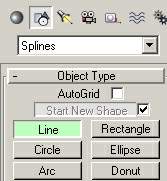
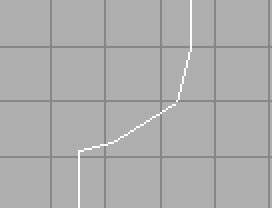
Lathe works like this. You draw a spline which represents the contour of an object and then let it rotate around a specified axis. This feature is often called revolve in other programs. First we draw our spline in the Front viewport. Press the Shapes button in the create tab and click line.
Now create the contour of the object we wanna create, in this case the base of our pillar. Like this:
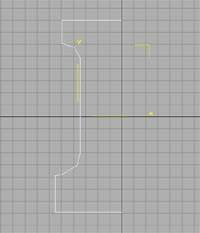
Notice that its corners are sharp and not smooth.
We want it to be smooth and therefore we run into modify mode. Press the modify tab and go into Sub-Object mode. Now you see that small vertices pop up along our path in every corner. Right-click the vertices you want to edit and select smooth from the rolldown. The corners are now smoothened but may look a bit bad and therefore we right-click again and select beizer. With beizer small handles pop up. You can drag these and in that way manipulate the look of your smoothened corner.
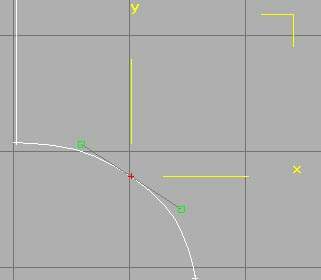
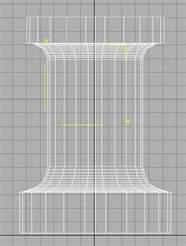
All that is left now is to rotate this contour around itself. Press the lathe button in the modifier tab and see the result. You will notice that it didn't look as we planned to, well that because we rotated it around its center and not around the perimeter. Click the max button and it will look much better. Also you might want to add more segments to it, just to smooth it up some more.
The steps up to the altar and the candles were done in the same way. The cross by the way just consists of thin rectangular boxes arranged in a cross-like manner. There are also some banners hanging on each side of the altar. Those are created with something called patches and then mapped with an opacity map. I will explain how those are made in the tutor on textures.
What's left now in this part is how to create the windows and the arc behind the altar. The arc is easy to create, it's just a tube with slicing on and set to 180 degrees, i.e. half a circle. To accomplish that you just have to tick the little box in the properties of the tube (under the modify tab) which says slice on. Then set it to start at 0 and end at 180. Easy as stealing candy from a child. ;)
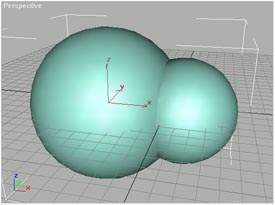
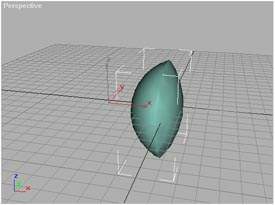
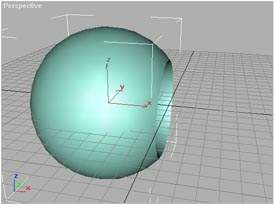
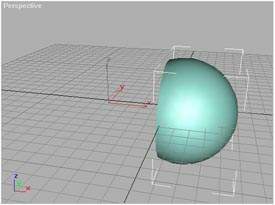
The window is a bit more tricky, but in no way difficult. It's done with something called boolean. Booleans work like this. You have two objects, one that is the object you want to change and one that is our "sculpting" tool. The "sculpting" tool can either be subtracted, added, merged or differentiated with the first one. It's very easy so don't let my lousy explanation scare you. I will demonstrate this with two balls to make it as clear as possible. First we create the two balls, one a bit larger than the other. We select the first of them and in the create menu there is this rolldown which says standard primitives. Select compound objects and the press the boolean button. Now you can see a button which says pick operand b, operand b is our "sculpting" tool. First you want to select which type of operation you want to perform. They are: Union, Intersection, Subtraction (A-B), Subtraction (B-A) and Cut.
Look at these pictures to see what they do:
With the knowledge you've now aquired you should be able to model the scene I did, if not maybe you should drop me a mail. The next part will be on textures and such so play around with the different things you've learned so far. Also try different options for the techniques I've used in this part. You might discover some cool things. Until next time... behave well! :)